
Healing Process
Your eyebrows might be swollen and there is redness around them. The area is tender to the touch. The strokes might look too dark and thick and you might feel that this was a bad idea.
The area around your brows is very sensitive and prone to infections, so you have to be careful. Some bleeding might occur.
What to do? Don’t panic! The color will change into the desired one. Brows will become almost 50% lighter once they are healed. Follow the aftercare instructions religiously. Don’t wash your face, don’t apply any makeup, don’t sleep on your face, avoid extensive sweating, swimming pools, saunas, and sunlight exposure.

Your brows will look better and you will be satisfied. You are getting used to the fact that you don’t have to draw or fill them in with a pencil every morning. They are still too dark, but are slowly starting to fade.
What to do? Keep taking special care of the microbladed area. Don’t be worried if your brows still look too dark – this is perfectly normal, the pigments just haven’t settled yet.

Somewhere around day 5 the scabbing stage begins. The microbladed area is itchy. You might feel irritated, but scratching is strictly forbidden. The area is still pretty sensitive and scratching can cause complications.
The pigment has been inserted only two layers under your skin. It does not go as deep as with traditional tattoo. Because of this, scratching can take it off, and picking at your scabs can literally rip out the pigment from larger areas and leave you with patches.
The flaking starts and the scabs emerge. If you are not familiar with the stages of the healing process, you might freak out. Bear in mind that this is quite normal and almost everybody has to deal with the scabs after the microblading process. Some people’s skin flakes extensively, while others barely have any scabs.
What to do? Calm down and patiently wait for the scabbing stage to finish. You can now wash your face gently but be careful with the microbladed area. Do not scratch the area around your brows because you might pull the pigment out. If you accidentally scratch and take off the pigment, it can be fixed at the touch up.

The scabs are starting to come off and your brows are much lighter then they should be. You might think that your skin is rejecting the pigment, but this is usually not the case. After all the scabbing and peeling, your brows are still recovering. Now they are light and patchy.
You might notice the baby skin beneath the scabs looks unnaturally light – don’t worry, it will blend in within a few days.
What to do? Again, don’t freak out. Don’t run to the microblading artist asking for a money refund thinking that the whole treatment was unsuccessful. This happens to almost everyone who has had their brows microbladed. If you are really unhappy with them, you can wear makeup, but only if the scabbing is over so as not to cause an infection. Otherwise, relax and wait for the color to come back.

The hardest period is behind you. Your microbladed brows are taking their final shape. They might look patchy at the beginning, but some microbladed strokes will reappear. This is still not the end, and you need to be patient just a bit longer.
You might feel excited because the final look of your brows is just around the corner. You are also relieved because all the scabbing is over. The skin of the treated area is not so sensitive anymore, so you can slowly start behaving normally, but keep following your artist’s instructions and avoid certain products and activities.
At the end of the third week, you will see what the brows look like and how the skin has taken the pigment. If it is still patchy, don’t worry, they can be corrected at the touch up appointment.
What to do? Schedule a touch up. It is supposed to be done at the end of the healing process, i.e. 4-6 weeks after the treatment, but some artists prefer to wait as long as 8 weeks to pass. The touchup is there to correct all the imperfections. For example, if the brows look uneven or if they are patchy, additional strokes are added.
Aftercare
Complete instructions day by day
Aftercare
Your eyebrows maybe sensitive and swollen. They also appear too dark.
Two hours after the process, clean the brows.
- For cleaning the eyebrows, you will need a q-tip and a lightly moisten, plus a distilled water. If you don’t have distilled water, you can use boiled water. Just make sure it is cool, to avoid burnings.
- Gently wipe the area, cleaning away any residuals that appeared on the skin
- Gently dry pat with a tissue
- Add a new q-tip and apply a healing balm
In the first 24 hours, don’t take vitamins that can thin your blood. Also avoid alcohol and some tablets such as aspirin.
Wash your brows with some sterile water on a cotton pad, or use antibacterial soap (follow your artist’s instructions).
Repeat it 2-4 times a day to avoid build-up of lymph in the area. Be very gentle and make sure your hands are clean. After cleaning your brows apply a thin layer of an ointment if advised. You shouldn’t use too much ointment – your brows mustn’t look greasy.
Usually around day 5, the scabbing stage begins. Let the scabs fall off naturally. If you touch them, you risk ruining your microblading. Carry on with the aftercare routine – wash gently, dry, moisturize if advised.
If you notice anything suspicious, such as heavy scabbing or irritation, contact your artist.

You don’t need to apply ointment any longer. On the 14th day you can go back to your everyday routine. You can wash your face normally and even apply some makeup if you have to.
Common Questions...
How Do I Maintain My Microblading Once It’s Healed?
How Do I Maintain My Microblading Once It’s Healed?
How Do I Maintain My Microblading Once It’s Healed?
Which Ointment Should I Choose for the Microblading Aftercare?
Which Ointment Should I Choose for the Microblading Aftercare?
What Do I Do When My Microblading Starts Fading?
What Do I Do When My Microblading Starts Fading?
What Do I Do When My Microblading Starts Fading?
What Do I Do When My Microblading Starts Fading?
Day 1:
Your lips have swelling, are tender, and have a heavy, thick lipstick look with a reddish-brick color. For the first few days, the color is darker than it will appear when healed.
Day 2:
lips have slight swelling, are reddish in color, are tender, and have a slight metallic taste.
Day 3:
These lips have less swelling, a thicker texture, are orange, are sore, and have a hot feeling. They are pre-exfoliation.
Day 4:
Exfoliation begins with very chapped lips. The color will become lighter as the epidermis sloughs off. It will appear that lips have lost all of their color during this phase of healing; however, when lips have healed completely, the dermal layer will gradually become darker.
Day 5:
These lips are very chapped, but are nearly finished with the chapping phase of healing.
Day 6:
During this phase, a soft, rich color begins to appear in the lips.
Days 7-13:
During this phase, lip color disappears and the frosty second chapping phase begins as a whitish, gray haze on the lips.
Day 14:
Color blooms from within more and more each day until day 21 ( which is 3 weeks post-procedure).
Day 21:
Healing is complete. The lip color you see is the color that you have. Your lips will remain a bit dry for a month or two. Use a good lip balm, and they will return to normal with full color.
Remember, place nothing on the treated area (except your aftercare product) until healed. This this means no makeup, creams, water (except for cleansing as detailed below), etc.
After your procedure, your skin will start forming a protective scab. You may see fluid or ooze on the skin from lymph secretion. The fluid should be dabbed and blotted off with a sterile gauze pad. It can crust the skin over and prevent it from breathing and healing.
After 24 hours, clean the treated area daily with mild warm water and non-alcohol soap. Apply soapy solution on a sterile gauze and blot 4 to 5 times to clean. Then blot completely dry. Use patting motions only. No Scrubbing. No rubbing. No wiping. No scratching. Make sure the area is completely dry because germs love moisture!
Lips will ooze for a couple days and peel for a week or so. After sleeping, crust will have dried on the lips. Blot with water. Clean and apply aftercare product as directed. Try not to disturb the crust when cleaning and let it fall off by itself. Picking and pulling off skin that is not ready to come off will cause pigment loss and can pull out deeper tissue. The edges or lip liner will be the last to fall off. Pulling this off will result in an uneven splotchy line or an indented scar.
Apply aftercare product on the clean and dry treated area. Place the ointment on the scabs that are beginning to form. If you place ointment on the area and it is not dry, this may cause irritation or an infection and could lead to color loss.
Keep your lips moist all the times with the aftercare product. After approximately 3 weeks after the procedure when no more scabs are present, discontinue the aftercare product. Begin to apply sunblock appropriate for lips to protect the pigment and a good lip balm.
Lips will be tender at first after the procedure. Drink only through a straw. Choose to only eat foods you can place in your mouth with a fork without touching the lips.
Do not eat spicy foods or hot liquids for 48 hours after your procedure. It’s a good idea not to eat oily foods, salty foods, acidic foods or alcohol while healing.
Do not get toothpaste on your lips. It’s a good idea to brush your teeth with just water for 72 hrs post-treatment.
Do not bleach your teeth until your lips are healed.
Do not excessively stretch lips while they are healing with big smiles or pucker lips with smoking. Those motions push and pull against the lip edges, applying tension and friction between the strong normal skin surrounding the mouth and the broken inflamed lip edges. Lip skin is a continuation of the delicate mucous membrane of the mouth. It is not strong like normal skin.
Day 1:
The eyes will be swollen and sore, like you have been crying, with a heavier eye makeup look. For the first 3-4 days, the color is darker than it will appear when healed.
Day 2:
The eyelids are swollen for a few hours after waking up, and your makeup will still look heavy.
Day 3:
Swelling decreases but is not gone entirely. There is a tight feeling to your treated area. The top layers of skin begin to lift away. The soreness will become less as the treated area begins to exfoliate. A rough texture appears on the skin.
Day 4:
There is a pinching feeling to your treated area. Some itching is normal as the skin begins to flake. When the eyeliner area begins to exfoliate, do not pick at it!
Day 5:
Color is somewhat grayish and will take a few more days to clarify to full color. The pigmented area begins to shrink and soften in size and color over the next few days.
As exfoliation completes, the color will appear a bit frosty; this will clarify in a few days.
Day 6-9:
The color has lightened from its initial overly-dark appearance. For the next few days, the color may now be lighter than what the final color will be.
Day 10:
The final color begins to stabilize and show through. The color will continue to soften as the healing process completes.
Immediately after the procedure, the eyelids will be slightly swollen. Because of the swelling, the eyeliner will appear to be much thicker and can be distorted. Also, the color will appear to be extremely dark, even when soft colors are used. In 2-3 days, the liner will be reduced to the desired thickness and will be more even as the swelling goes down. The color will lighten as the healing process progresses. Full healing is complete within 4-6 weeks. After that, your final color and shape can be assessed and touched up if necessary.
Following the procedure, you can expect any of the following: mild to moderate swelling, redness, bruising and bloodshot eyes. If the swelling persists beyond 48 hours or becomes worse, or if the eyes become inflamed (red, itchy, watery, etc.) please seek medical attention. Please call us if this happens. This is a very rare occurrence, but it can develop in patients with extremely sensitive eyes.
Remember, place nothing on the treated area (except your aftercare product) until healed. This this means no makeup, creams, water (except for cleansing as detailed below), etc.
After your procedure, your skin will start forming a protective scab. You may see fluid or ooze on the skin from lymph secretion. The fluid should be dabbed and blotted off with a sterile gauze pad. It can crust the skin over and prevent it from breathing and healing.
After 24 hours, clean the treated area daily with mild warm water and non-alcohol soap. Apply soapy solution on a sterile gauze and blot 4 to 5 times to clean. Then blot completely dry. Use patting motions only. No Scrubbing. No rubbing. No wiping. No scratching. Make sure the area is completely dry because germs love moisture!
In the morning, if eyes are stuck together, use a wet Q-tip and gently separate. Do not rub, peel or pick. Follow instructions for cleaning and for aftercare product application.
Apply the provided aftercare product on the clean and dry treated areas. Place the product on the scabs that are beginning to form. You should apply 2 to 4 times daily until completely healed. If you place the product on the area and it is not dry, this may cause irritation or an infection, and could lead to color loss.
Please apply the aftercare product gingerly and don’t cake it on. However, try to cover the protective scabs completely. Try to put it directly on the scabs. The skin must be able to breathe to heal. Too much product may actually fade the pigment. It is specifically meant to put on the scabs and to keep them soft so they stay on longer. Pat, and do not rub, the ointment on the area with a with a Q-tip. If you put too much on, then blot off the excess ointment with a sterile gauze.
If your scabs become hard and rope-like, they can fall off in big chunks and take the ink with them. Soft scabs that flake off on their own are the key to successful ink retention. Do not try to rush the scab-flaking process.
You can stop using ointment when you have no more scabs. This can last 4 to 10 days, but sometimes as long as 14 days. It is hard to say because people have different healing periods.
Do not use saline eye drops or mascara until healed 14 days. Do not use old tubes of mascara. Replace old tubes with new ones. Old eye makeup can contaminate wounds.
Do not wear contact lenses after the procedure for 24 hours.
What to expect & Aftercare
After undergoing a microneedling procedure, some side effects are to be expected. When you leave your appointment, your skin may be flushed or flushed, as if you've spent all day in the sun and have a mild to moderate sunburn.
Most likely, the redness and swelling will persist for 24 hours or a little longer. Even with careful aftercare, there isn't much you can do to remove redness immediately after microneedling.
Covering redness with makeup is one of the worst things you can do, as the makeup will block the pores on your newly exposed skin and could even cause breakouts. You will need to have a little patience as the redness subsides, but in the meantime, you can apply gentle, unscented products with natural ingredients for some relief.
Swelling and some flaking of the skin are considered normal for up to 48 hours after the procedure. Other side effects such as bumps, breakouts and dry skin are also within the scope of what you may experience after microneedling, but not everyone will experience them.
Caring for your skin with mild cleansers and moisturizers can keep its side effects to a minimum.

As a general rule of thumb, you should constantly seek sunscreen for the first 2 weeks after microneedling. Be sure to apply sunscreen every time you go outside in the days after your treatment.
Do not spend prolonged time in the sun for the first week after your microneedling procedure, as you will be more prone to sun damage than usual.
Use any topical antibiotic cream to avoid infection.
Wash your hands before touching your face.
Do not apply makeup, especially with a makeup brush that has been used before, within 24 hours after the microneedle.
You'll also need to avoid swimming pools, saunas, and situations where you might sweat a lot, including intense workouts at the gym, to protect your freshly treated skin.
After 72 hours have passed, you may be able to resume these activities.
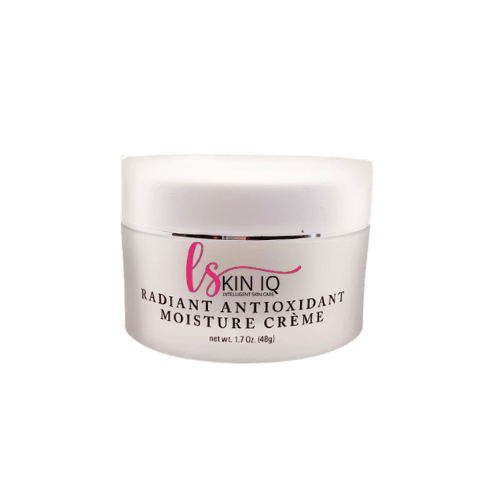
For the first few days after your microneedling procedure, you will want to avoid any skin care products that contain harsh chemicals intended to exfoliate. Avoid anything that has a scent and do not use glycolic acid or alpha hydroxy acids.
Retinol A and Vitamin C serum should be avoided for at least 48 hours after microneedling.
After 2 full days have passed, you may want to gradually add products back to your daily beauty routine rather than following your usual regimen, especially if you use products that have strong anti-aging formulas.
Hyaluronic acid can be used after the microneedle, and is even recommended in some cases to help stimulate collagen production after your procedure.
If your skin feels dry, it is generally safe to apply coconut oil as an emollient to lock in moisture and hydrate your face after the microneedle. Diluted witch hazel without alcohol can also be used to cleanse dry skin. Stick to mild, natural ingredients that you are familiar with.
The redness you experience with microneedles will mostly fade within 48 hours.
Other symptoms, such as flaking and breakouts, may take a little longer to resolve. Most of the visible microneedle recovery occurs in the first day or two after treatment, but healing will continue to occur below the skin's surface for up to 2 months later.
When to see a doctor:
The microneedle is generally a very low-risk procedure. Occasionally, side effects can be intensified and require medical attention. Symptoms to look out for include:
fever over 100.4 ° F (38 ° C)
nausea
urticaria
yellow or green discharge
bleeding
headache
Fibroblast:
What to expect & After Care!
Microneedling:
What to expect & After Care!
Find out what to expect throughout the fibroblast healing process. We break it down for you from pre to post.
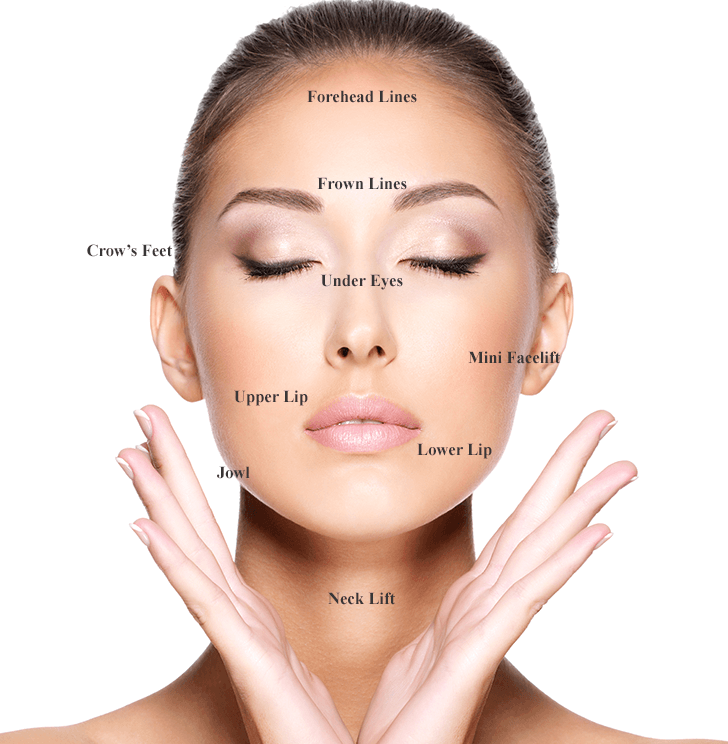
What to expect & Aftercare
How Does Fibroblast Work?
Fibroblast is done with a small hand-held device that uses electrical current to reduce the appearance of fine lines, wrinkles, and dark spots for an overall more youthful appearance. The needle-like tip of the pen never touches the surface of the skin but instead, the electrical current between the tip of the pen and the skin creates small dots on the skin's surface to achieve these results in an improved appearance. Another attachment may be used in which we refer to as the “thick tip” which is used directly on the skin’s surface to achieve similar results.
How Long Does It Last?
Fibroblast is a cosmetic procedure to help reduce the obvious appearance of wrinkles, fine lines, and dark spots. Because this is a cosmetic procedure for the purpose of improving the appearance, results are not permanent. However, fibroblast has shown great results in reducing the appearance of common age signs that can last a few years. Results are often seen almost immediately, but best results appear a few weeks post-procedure. Results will vary from person to person and many other factors and it is possible that multiple sessions may be required for desired results. It can be considered to receive this procedure every few years to reduce the appearance of any recurring signs of aging that appear over time.
There are many lifestyle factors that can increase signs of aging such as smoking, alcohol consumption, and prolonged sun exposure. Limiting or eliminating things such as these will increase the results of the procedure and decrease the common appearances of aging.
How Many Sessions Are Required?
The number of sessions required will vary according to the area being targeted, skin laxity, the desired results and the individual’s response to the procedure. Most see results instantly and will continue to improve over the course of the following eight weeks. Further sessions can be carried out to achieve better results. Appointments must be spaced out by 4-8 weeks.
Before deciding a second session in the same area is needed to get a better tightening-effect, make sure of the following:
At least two months have passed because it will take that long to get true results. Also note that we do suggest you target surrounding areas first before going back into the same area twice because of less than desired results.
Day of Procedure:
On the procedure day, it is recommended that no make-up is worn on the targeted area. You may take an antihistamine 30 minutes prior to their appointment to help with any swelling that may occur from the skin surface disruption. You may continue to take antihistamines for 2-3 days following the appointment. A numbing agent is applied and left to take effect for up to 30 minutes. When the area is sufficiently numb, the session begins with multiple connections of the fibroblast tip, spaced closely together. You may feel some heat in the procedure area, which may be uncomfortable and slightly irritating. Procedure time is usually between 10-40 minutes, depending on the size of the area.
Immediately after fibroblasting, the area may be red, mildly swollen, with small brown dots due to the microscopic disruption at the skin's surface, similar to body's response of healing. You may experience a sensation similar to a sunburn which will likely last a few hours. Swelling may intensify over the following few hours and more so in the eye area which may last 2-3 days. Results gradually improve the appearance over the course of the following eight weeks.
Following the procedure, you should closely follow the aftercare instructions on this sheet to ensure you receive the best results. In the week or so following the procedure, an exfoliating wash or cleanser should not be used. Instead, opt for a pH balanced soap (Dove), and avoid rubbing the area.
Pre-Treatment:
▪ It is recommended that sun protection of SPF 30-50 be used daily for at least two weeks prior to Fibroblast
▪ Skin care products with ingredients such as retinols, alpha-hydroxy acids (AHAs), tretinoin or any type of Vitamin A derivatives should be avoided.
▪ Stay out of the sun, tanning salons and refrain from using any self-tanning products for three weeks.
▪ You must complete and sign all procedures, medical history, hold harmless and waiver forms to ensure you understand the potential benefits and risks associated with the Fibroblast procedure(s).
▪ We recommend receiving “before and after” photos for comparison. A photo consent waiver will be provided for you.

● Most people will experience a mild burning sensation immediately following any Fibroblast procedure. This is similar to a sunburn which should resolve within a few hours. However, this depends on tolerance and discomfort may last longer. If they feel particularly uncomfortable, anti-inflammatories such as Advil or antihistamines such as Benadryl are suggested. It is up to the individual to decide on self-medication.
● Similar to the body's natural healing response, it is usual for the area to become swollen, especially around the more delicate area such as the eyes. Ice packs not only soothes but also helps the swelling. Recovery can vary depending on each client's natural rate of recovery. If there are any adverse reactions, it is advised to seek medical attention.
● Initially after fibroblast and up to three days later, there may be occasional weeping. This is similar to the natural healing response of the body.
● The area may become dry for a few days
● Make sure to inform them that they scratch, scrub, pick or irritate the area in any way. It is important to keep this area clean. Twice daily, in the morning and in the evening, carefully clean the areas, then disinfect it with distilled water spray and gently dab with a clean, lint-free cloth. After, apply provided ointment.
● It is strongly advised that they use an SPF 30-50 sunscreen (throughout the year including the colder months) to avoid sunburn as the area’s sensitivity to sunlight may be heightened for up to 3-4 months post Fibroblast procedure. This will also help prevent any increased future signs of aging.
● Boiled lukewarm water is best for cleaning the area(s).
● DO NOT use alcohol-based cleansers
● If at any time the area(s) become too hot, red or shows sign of pus, inform them to contact a medical professional for advice as they may be developing an infection.
● For optimum results, more than one Fibroblast procedure is usually needed and can be performed typically 8-12 weeks onwards after the initial procedure.
● Pink/red skin may form (typically the 5-8 days)
● Sunscreen lotion of SPF50 is recommended six months post Fibroblast
● Swimming and sauna activities should be avoided for at least two weeks post procedure.
● Smokers may experience a significant worsening of the blood flow, which can increase the time of some of these aftercare instructions
● Follow up procedure will not be before eight weeks from the first procedure date.

● A minimum of SPF50 must be applied and exposure to the sun should be avoided
● Regular moisturizing with either an all natural moisturizer or hyaluronic acid is vital to replenish moisture and prevent the skin from becoming dry and peeling.
For 12 Hours After Treatment:
● No Makeup
For 48 Hours After Treatment:
● No Sauna
● No Sunbeds
● No Sun Exposure
● No Botox, Collagen Injections or Dermal Fillers
For 1 Week After Treatment:
● No Swimming
● Do Not Use Anti-Aging Creams
● Do Not Use AHA’s, Glycolic or Retinol
● Do Not Use Exfoliating Products
